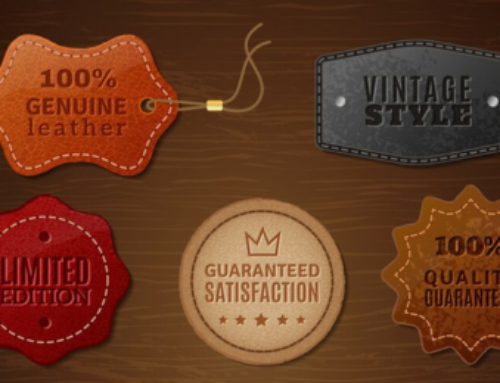
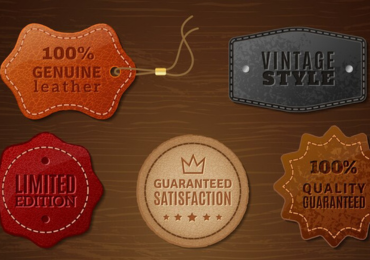
Embroidery digitizing is an intricate art form that can elevate the aesthetics of any garment or fabric. However, even the most skilled embroiderers can stumble upon common pitfalls that compromise the quality of their work. Among these, logo embroidery stands out as both a challenge and an opportunity to showcase craftsmanship. Whether you’re a seasoned embroiderer or just starting out in the world of digitizing, understanding and avoiding these common mistakes is crucial to achieving flawless results.
In this guide, we delve into five prevalent mistakes encountered in logo embroidery digitizing. From design oversights to technical errors, each misstep can significantly impact the final product’s appearance and durability. By identifying these pitfalls and learning how to navigate around them, you’ll be equipped with the knowledge to enhance your embroidery projects and deliver exceptional results every time.
Join us as we explore the intricacies of logo embroidery digitizing, unraveling the mysteries behind these common mistakes and providing actionable insights to ensure your creations stand out for all the right reasons. Whether you’re embroidering logos for corporate apparel, sports uniforms, or personal branding, mastering these techniques will set you on the path to perfection. Let’s embark on this journey together and elevate your embroidery game to new heights.
Introduction to Logo Embroidery Digitizing
Embroidery has been an integral part of human culture for centuries, serving as a means of artistic expression, cultural identification, and personalization. In the modern era, the art of embroidery has seamlessly merged with technology, giving rise to logo embroidery digitizing – a process that translates digital designs into embroidery machine-readable formats. This section will delve into the fundamentals of logo embroidery digitizing, highlighting its significance, evolution, and the importance of quality digitizing.
What is Logo Embroidery Digitizing?
Logo embroidery digitizing is the process of converting artwork or logos into digital files that can be read by embroidery machines. It involves meticulously mapping out stitch patterns, colors, and other design elements to ensure accurate replication on fabric. Unlike traditional hand embroidery, which relies on manual stitching, digitizing automates the embroidery process, allowing for faster production and precise replication of intricate designs.
Importance of Quality Embroidery Digitizing
The quality of embroidery digitizing plays a pivotal role in the final output of embroidered products. Poor digitizing can result in misaligned stitches, thread breaks, and distorted designs, leading to subpar finished products. On the contrary, high-quality digitizing ensures crisp, clean, and visually appealing embroidery, enhancing the overall aesthetic and perceived value of the end product. Whether it’s corporate logos on uniforms, intricate designs on apparel, or decorative elements on accessories, quality digitizing is essential for achieving professional results.
Evolution of Logo Embroidery
Logo embroidery digitizing has undergone significant evolution alongside advancements in technology and design software. From the early days of manually punching designs into embroidery cards to the advent of computerized digitizing software, the process has become more accessible, efficient, and versatile. Today, digitizing software offers a plethora of tools and features that streamline the digitizing process, allowing designers to create complex designs with ease. Moreover, the integration of cloud-based platforms and online marketplaces has democratized access to digitizing services, empowering businesses and individuals to bring their creative visions to life through embroidery.
Embarking on the journey of logo embroidery digitizing requires a thorough understanding of the process, tools, and best practices to avoid common pitfalls and achieve superior results. In the following sections, we’ll explore five common mistakes to avoid in logo embroidery digitizing and provide actionable insights to elevate your digitizing game.
Mistake 1: Neglecting Proper File Formats
Understanding File Formats for Embroidery Digitizing
When it comes to logo embroidery digitizing, the choice of file format is paramount. Unlike digital graphics intended for web or print, embroidery machines require specific file formats that encode information about stitch patterns, colors, and other embroidery parameters. Vector formats such as SVG (Scalable Vector Graphics) or EPS (Encapsulated PostScript) are preferred for embroidery digitizing due to their ability to scale without loss of quality. These formats provide the necessary precision and flexibility required for accurate replication of designs on fabric.
Common File Format Mistakes
One common mistake in logo embroidery digitizing is using raster-based formats like JPEG or PNG instead of vector formats. Raster formats are composed of pixels and are not suitable for embroidery digitizing as they lack the necessary stitch information. Converting raster images to embroidery files can result in poor quality, loss of detail, and inaccurate color representation. Additionally, using formats with compression algorithms like JPEG can introduce artifacts and distortions, further degrading the quality of the embroidery.
Solutions and Best Practices
To avoid the pitfalls associated with improper file formats, it’s essential to start with high-quality vector graphics when digitizing logos or artwork for embroidery. Design software such as Adobe Illustrator or CorelDRAW allows designers to create and manipulate vector graphics with precision, ensuring optimal results in embroidery digitizing. When exporting files for digitizing, save them in SVG or EPS format to preserve the integrity of the design and facilitate seamless conversion into embroidery files.
Real-life Examples
- Using JPEG instead of vector formats like SVG or EPS
- Converting images with lossy compression
- Not providing the correct Pantone colors
Consider a scenario where a company wants to embroider its logo on employee uniforms. The marketing department provides a JPEG image of the logo to the embroidery digitizer, unaware of the implications of using a raster format. As a result, the embroidered logos appear pixelated and lack the crispness and clarity of the original design. In contrast, had they provided a vector version of the logo, the embroidery digitizer could have preserved the integrity of the design and produced high-quality embroidered logos that accurately represent the brand.
In summary, neglecting proper file formats can undermine the quality and effectiveness of logo embroidery digitizing. By adhering to best practices and leveraging vector graphics, designers can ensure superior results and avoid costly mistakes in the digitizing process.
Mistake 2: Ignoring Stitch Density and Length
Significance of Stitch Density and Length
Stitch density and length are crucial factors that significantly impact the quality and appearance of embroidered designs. Stitch density refers to the number of stitches per unit area, while stitch length determines the length of individual stitches. Proper adjustment of these parameters is essential to achieve optimal embroidery results.
Impact on Embroidery Quality
Ignoring stitch density and length can lead to various issues such as puckering, thread breakage, and distortion of the design. Insufficient stitch density may result in gaps between stitches, causing the fabric to show through and compromising the overall integrity of the design. On the other hand, excessive stitch density can cause the fabric to pucker and distort, detracting from the aesthetic appeal of the embroidery.
How to Determine Optimal Stitch Density and Length
Determining the optimal stitch density and length requires consideration of several factors, including the type of fabric, design complexity, and embroidery machine capabilities. Conducting test runs on similar fabric beforehand can help identify the ideal settings for stitch density and length. Additionally, utilizing embroidery digitizing software with simulation features allows designers to preview and adjust stitch parameters in real-time, ensuring optimal results.
Tips for Adjusting Stitch Density and Length
- Test stitching on similar fabric beforehand
- Consider the size and intricacy of the design
- Utilize software tools for simulation and adjustment
For example, when embroidering a dense design on lightweight fabric, it’s essential to reduce stitch density and length to prevent puckering and distortion. Conversely, for intricate designs with fine details, increasing stitch density may be necessary to ensure adequate coverage and clarity. By carefully adjusting stitch parameters based on fabric type and design complexity, designers can achieve optimal embroidery results that meet quality standards and exceed customer expectations.
In conclusion, ignoring stitch density and length in logo embroidery digitizing can lead to subpar results and compromise the overall quality of embroidered designs. By understanding the significance of these parameters and following best practices for adjustment, designers can enhance the aesthetic appeal and durability of embroidered products.
Mistake 3: Disregarding Fabric Type and Thickness
Importance of Fabric Selection
Fabric selection is a critical aspect of logo embroidery digitizing that is often overlooked. Different fabrics possess varying characteristics such as texture, weight, and stretchability, which can significantly influence the embroidery process and final outcome. It’s essential to consider the intended use of the embroidered product and select the appropriate fabric accordingly.
Challenges with Different Fabric Types
Embroidering on different fabric types presents unique challenges that must be addressed during the digitizing process. For example, lightweight and delicate fabrics like chiffon or silk require careful handling to prevent puckering or distortion, while heavyweight fabrics like denim or canvas may pose challenges in achieving adequate stitch penetration. Failure to account for these differences can result in suboptimal embroidery quality and customer dissatisfaction.
Adapting Designs for Various Fabrics
Adapting designs for various fabrics involves adjusting stitch parameters, such as density and length, to accommodate the characteristics of the fabric. For lightweight fabrics, reducing stitch density and length can help prevent puckering and ensure smooth embroidery. Conversely, for heavyweight fabrics, increasing stitch density and length may be necessary to achieve sufficient coverage and stability.
Techniques for Handling Thick Fabrics
- Choosing appropriate stabilizers
- Adjusting stitch density and length accordingly
- Using proper hooping techniques


Leave A Comment